| |
 Download the Bitmap Region project files (48kb) Download the Bitmap Region project files (48kb)
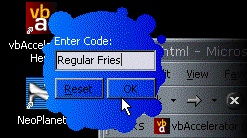
Introduction
The Windows Shape article shows how to use the SetWindowRgn function
to apply a geometric region to a window using the GDI region creation functions. However, beyond using a
simple geometric region, things get difficult. How do you specify the shape you want?
What you really want to do is to load a bitmap containing the shape and use that to create the region. VB allows you to
do this with UserControls (using the MaskPicture and setting the misleading Transparent setting for
the BackStyle property), but at a cost. The cost is performance - VB controls using these settings
can quickly become unusable. So much so there are even warnings in the VB5 Books OnLine against using the
setting if you use "... a complex bitmap [sic]".
The code to implement regions based on bitmaps isn't all that tricky, but it can lead to performance problems.
If you aren't a slave to VB's implementation, however, you can take the performance of complex region code
to new levels by precompiling your region data in files or resources. Sounds good? Then read on.
Bitmap to Region
The first part of this problem is how to create a region from a bitmap. To do this, you need to be able
to do two things:
- Read the colours of the pixels of the bitmap to determine which ones should be transparent.
- Remove transparent pixels from the region.
To get at bitmap bits, I use a DIBSection. DIBSections are a GDI
object with two very useful properties:
- The bitmap data is stored as a Display Independent Bitmap (i.e. Windows will not attempt
to map colours for you, or dither any pixels)
- The bitmap data is stored in Windows memory (rather than Graphics card memory), and is
therefore directly accessible to Windows programs for modification.
Once the bitmap is converted to a DIBSection, it is a simple matter to loop through the data and read
the data. More information on reading data within a DIBSection is given in the Image Processing samples
at this site.
The next part is to convert the bitmap data to a Win32 region. This is achieved using just two Win32 region
functions: CreateRectRgn and CombineRgn. The CombineRgn function is the powerful function
in this instance. CombineRgn allows boolean operations to be used on a pair of regions so they can be
combined in many ways: where they both intersect (RGN_AND), where either exists (RGN_OR),
where either but not both exists (RGN_XOR) and so forth.
The simplified algorithm to set up the region from the bitmap is therefore:
This algorithm attempts to improve performance compared to the simple pixel by pixel
algorithm by combining consecutive pixels in the y direction into a single rectangle.
Potentially there are more optimisations to be made (Can you
think of one?) Note that the real algorithm must also take into account that a DIBSection is
flipped vertically.
From Region to High Performance
That shows how to create a region, however, if you experiment with the code you will soon see that
the time it takes to create your region at run-time is significant if the source bitmap is large enough.
If you need to work with an arbitrary bitmap at run-time then you must live with this performance hit
(perhaps you could run some sort of attract sequence whilst the region create is running, similar to
the way many Shockwave animations attempt to hide their pathetic
load times - soon you will know why you need DSL or a Cable Modem!).
However, if you know the bitmap in advance, you can create the region for it almost
instantaneously by loading precompiled region data in the form that GDI's region code wants it.
GDI provides a function GetRegionData to return a region's set-up information in native format, and
also an inverse function ExtCreateRegion. With a little modification to the VB API viewer's
declares for these functions, we can convert them into usable functions:
Calling GetRegionData with the dwCount parameter set to zero and the lpRgnData parameter set to
ByVal 0& returns the number of bytes of data required to hold the region data. Then you can
dimension a byte array to hold this number of bytes. To get the data into the array of bytes, you
then set dwCount to the number of bytes and pass a reference to the first byte of the array to the lpRgnData
parameter.
To create a region, you just set the nCount parameter to the size of the array and pass the byte array
back info lpRgnData. The lpXform parameter is an optional parameter which only works under Windows NT/2000.
This allows you to rotate the region as it is created using a rotation matrix. To ignore this parameter,
pass in ByVal 0&.
Since the region data is now stored in a byte array, you can easily save and load it to a file or load
it from a resource. See the article Reading data
from local or external library resources. For the details of how to do this.
Put it Into Use
To use the code here, you need to incorporate two class libraries into your project:
-
cDIBSection - to allow creation of a DIBSection object to make the region from.
-
cDIBSectionRegion - the region creation and managment class.
cDIBSection
The use of cDIBSection is described elsewhere on this site, however
the only methods you will be interested in are the ones to create a bitmap to make your region from.
These are:
| |
Method
|
|
Description
|
|
| |
CreateFromPicture
|
|
takes a StdPicture object and creates a DIBSection containing the same bitmap bits
|
| |
Create
|
|
Creates a DIBSection at the specified size. You can then use LoadPictureBlt to
copy a bitmap from another hDC into the DIBSection.
|
 |
Tip Don't use a JPG file to create a window region
|
|
|
Whilst JPG files often have the smallest size, they are a generally a poor choice for applications
which need to create a mask (transparent) area. This is because JPG does not preserve colour stability
in an image. If you look close at a "black" area in a JPG file, you will actually see that the pixels
are all different, within around +/- 3 colour values of the actual value. This effect becomes more
pronounced (in scale as well as value) as the quality of the JPG file is reduced.
|
|
cDIBSectionRegion
Once you have a cDIBSection object containing the picture you want to create a bitmap from, you
can then use this to create a region. The cDIBSectionRegion also contains methods to save region
data to disk and to load region data from a file or a resource.
| |
Method
|
|
Description
|
|
| |
Create
|
|
Builds a region from a cDIBSection picture.
|
| |
Applied
|
|
Gets/sets whether the current region is applied to the specified window handle.
|
| |
AppliedToCount
|
|
Returns the number of windows the current region is applied to.
|
| |
hWndForIndex
|
|
Returns the window handle the region is applied to at the specified index .
|
| |
Destroy
|
|
Destroys the region, removing it from any window handle it is applied to.
|
| |
LoadFromFile
|
|
Loads a region from a file previously created using the Save method.
|
| |
LoadFromResource
|
|
Loads a region from a user-defined resource creating from the output of the Save method.
See the article Reading data
from local or external library resources for details on how to create the resource.
|
| |
Save
|
|
Saves the current region to a file for subsequent use with the LoadFromFile and LoadFromResource
functions.
|
The End of the Beginning
That's the end of arbitrary shaped windows under Win9x and NT. However, Windows 2000 includes a new
way for creating windows of any shape, including windows with semi-transparent (alpha-blended)
regions and so on. This is called Layered Windows, and will be covered in a forthcoming vbAccelerator
article. Here is what is says in MSDN about Layered Windows:
"Using a layered window can significantly improve performance and visual effects for a window
that has a complex shape, animates its shape, or wishes to use alpha blending effects.
The system automatically composes and repaints layered windows and the windows of underlying applications.
As a result, layered windows are rendered smoothly, without the flickering typical of complex
window regions. In addition, layered windows can be partially translucent, that is, alpha-blended."
Sounds cool? Just wait!
 Back to top Back to top
 Back to Source Code Back to Source Code
|
  |

